Clonezilla kept making bad images of my main partition, which I only found out about when trying to restore them (in this case to a different computer)
Here’s how I went about fixing the partitions in question:
- Download archlinux iso and put on usb drive using Yumi
- Boot into archlinux
- Find the partition number and partition type.

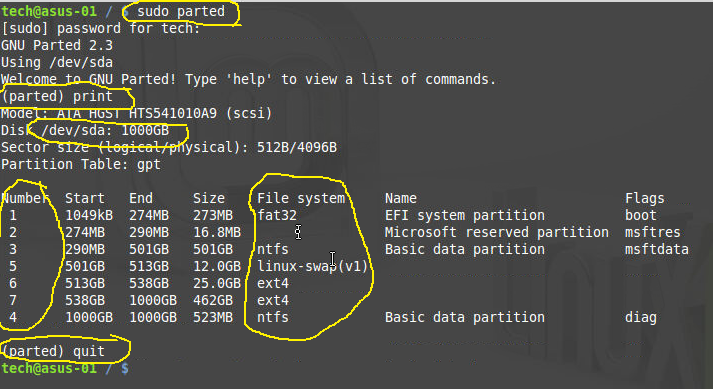
- sudo parted
- print
- Near top is the drive being looked at, i.e. /dev/sda
- The first column is the partition number which would translate to, i.e. /dev/sda1 or /dev/sda7
- The File system column gives information needed for the fsck command.
- Only fsck on ext<x> file systems (use windows for fat32 or ntfs)
- quit
- Check for mounted partitions (we don’t want to fsck on mounted partitions)

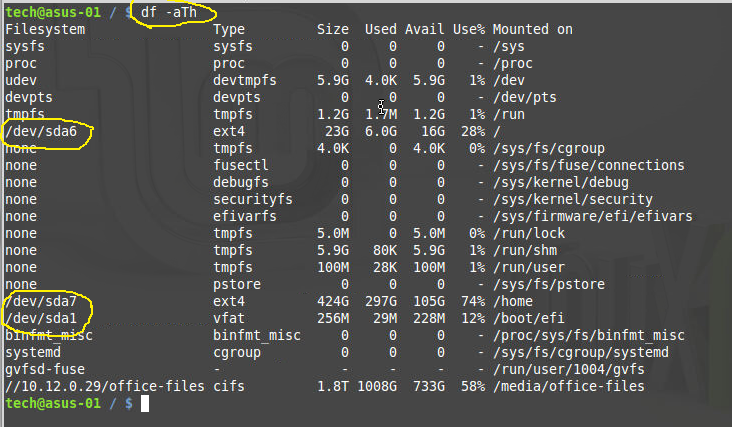
- df -aTh
- In the case of the image above we could not fsck /dev/sda6, /dev/sda7, or /dev/sda1
- The image above is from an active linux mint 17 session.
- When booting from ArchLinux you should not see any of the /dev/sda partitions mounted
- no need to exit
- df -aTh
- Unmount if needed
- umount /dev/<partition>
- Example: umount /dev/sda6
- Check the partition integrity
No screen shot because I couldn’t do that in Arch Linux- fsck.ext4 /dev/sda7
- Obviously, change the ext4 to the type matching in the the parted screen.
- Obviously, change the sda7 to match the parted screen
- There will be a report
In my case the fsck reported something like the block had a date in the future. While it reported this it also fixed it. Running the fsck command on that partition again did not show the same error message.
I just hope that this fixed my problem creating a good image with clonezilla!